Sendgrid Integration instructions
Mailcheck + SendGrid Integration instructions

Step by step guide
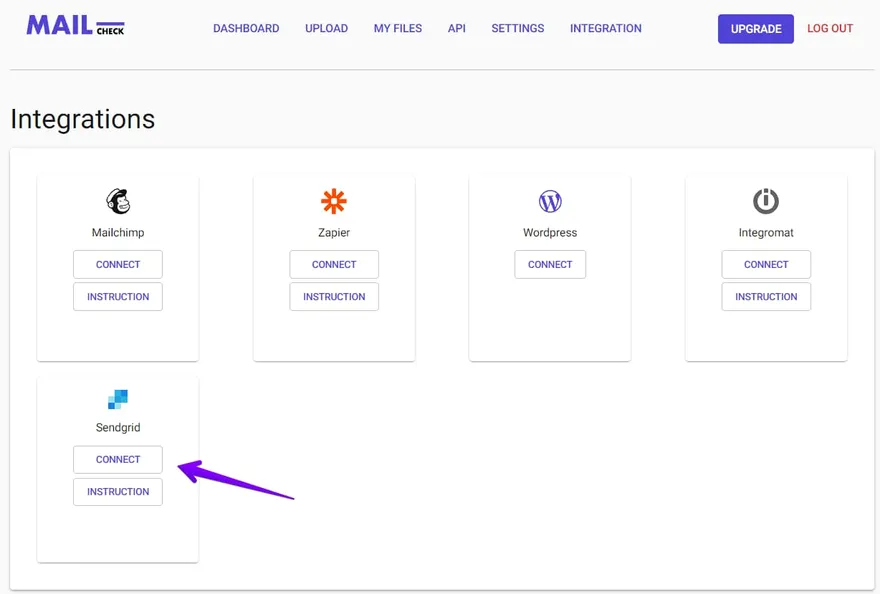
Step 1
Go to https://app.mailcheck.co/dashboard/integration and click “Connect”
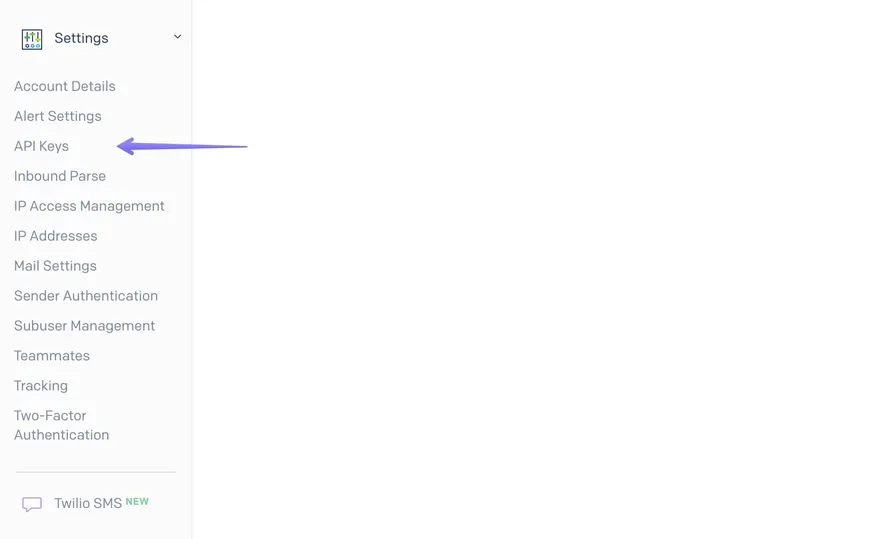
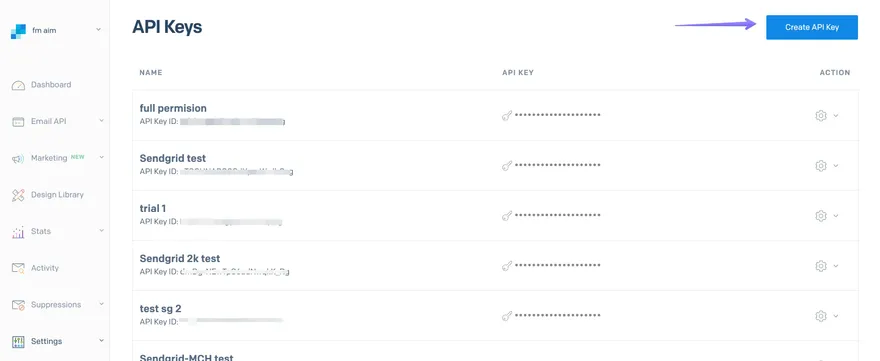
Step 2
Copy API key from your Sendgrid account - go to “Settings” in SendGrid and find “API Keys” hit “Create a key”
Step 3
Name your API Key and choose the API Key Permissions
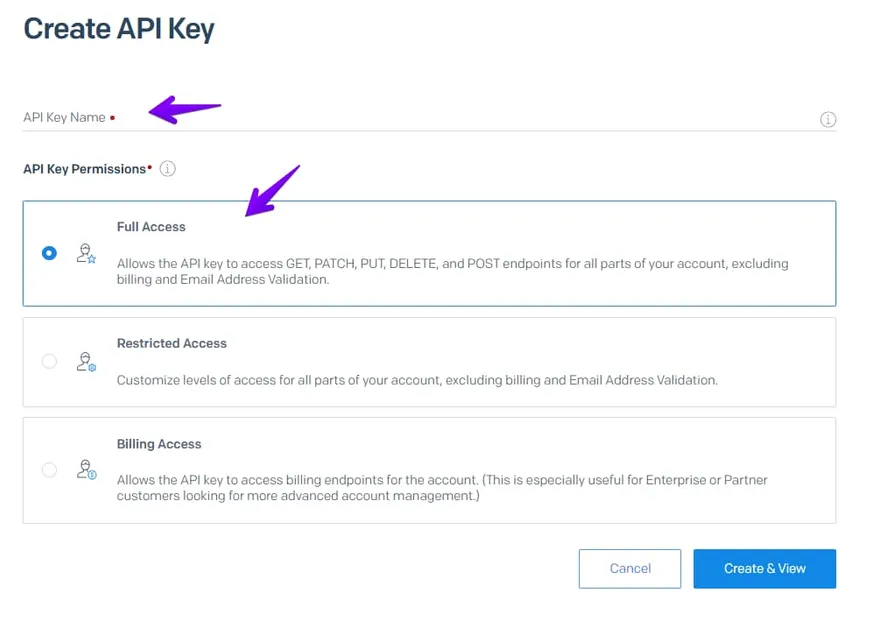
Step 4
You can decide between “Full access” AND “Restricted access” if you selected “Full access” then it’s sufficient to click “Create & View” button
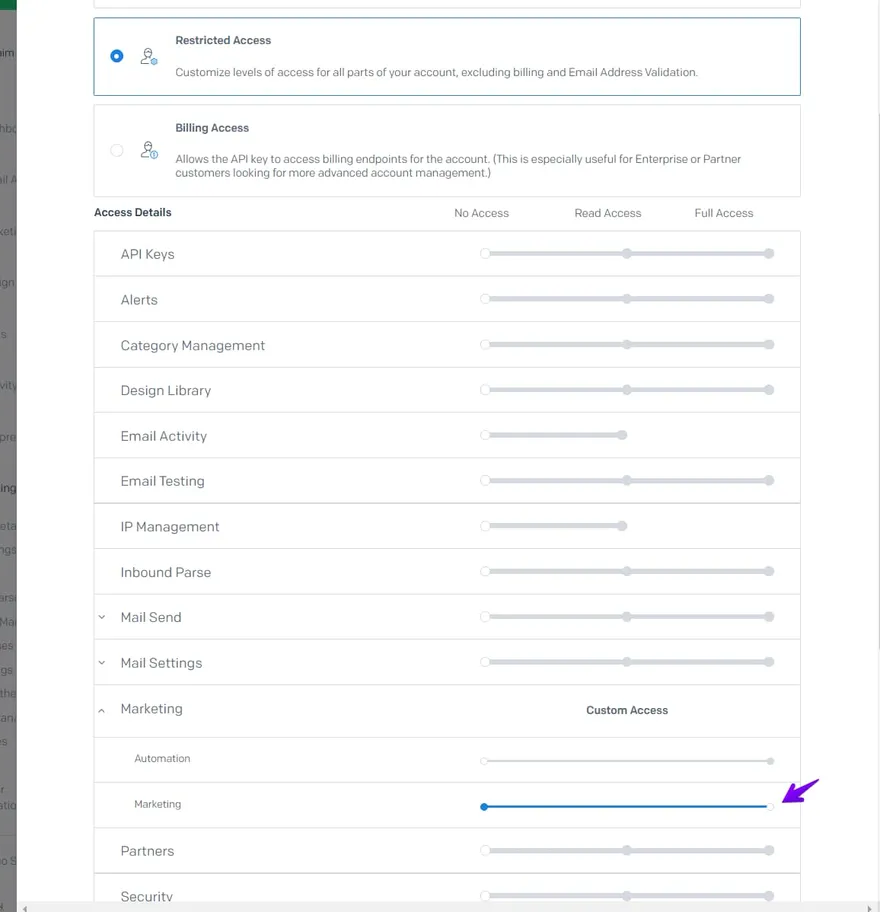
Step 5
Remember if you selected “Restricted Access” then follow the below schema: Please adjust only “Marketing” so it’s 100% highlighted with blue as in the below screenshot
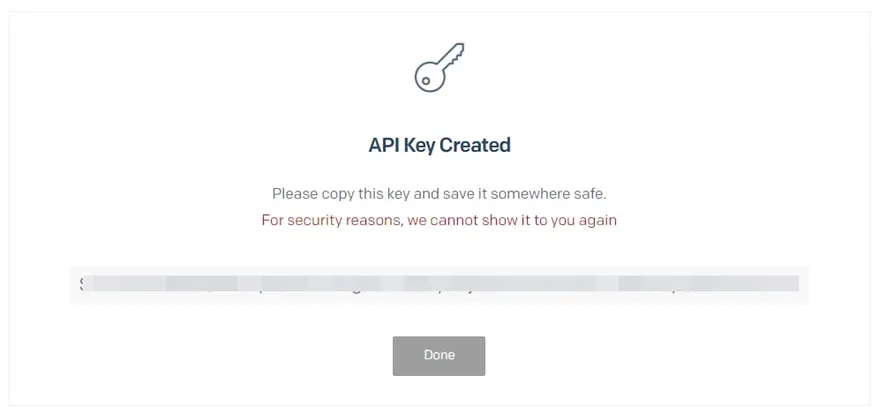
Step 6
Don’t forget to copy your key - this action won’t be repeated
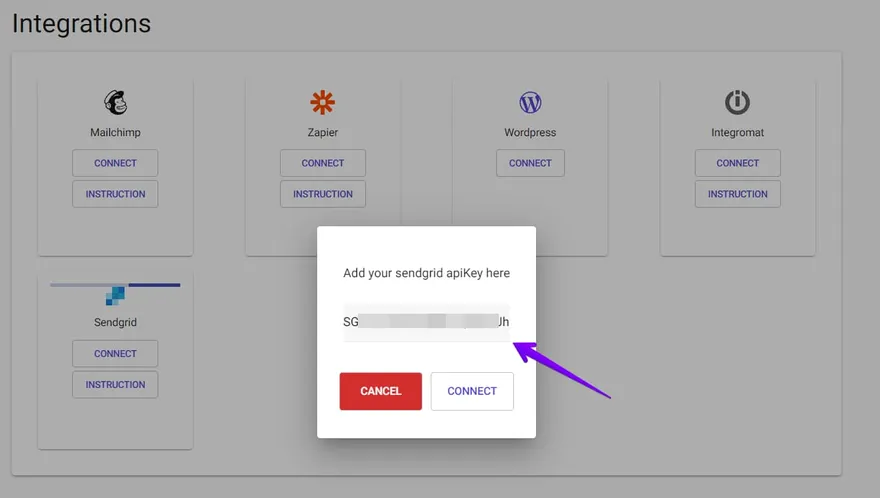
Step 7
Go back to https://app.mailcheck.co/dashboard/integration and add into the modal window API key and hit “Connect”
Step 8
If everything goes well, you’ll see three buttons
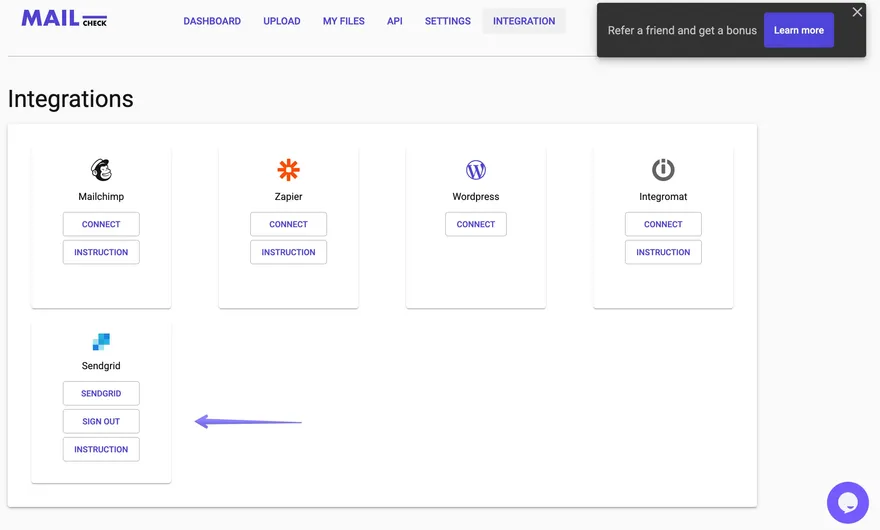
Step 9
Hit the “Sendgrid” button
Step 10
Before choosing the lists, please pay attention to “Only new contacts”
- For those who left the checkbox active - Mailcheck will be validating only NEW contacts, if it’s your first session, then nothing to worry about, it will validate all contacts. However. In case the new contacts were added right after the previous session and you still remain the checkbox “Only new contacts ”active” in this case the new emails will be checked ONLY
- For those who left the checkbox inactive - and it’s your very first session, nothing will happen, however, in case it’s your repeated session, unticked checkbox means your new contacts + previously validated one will be processed
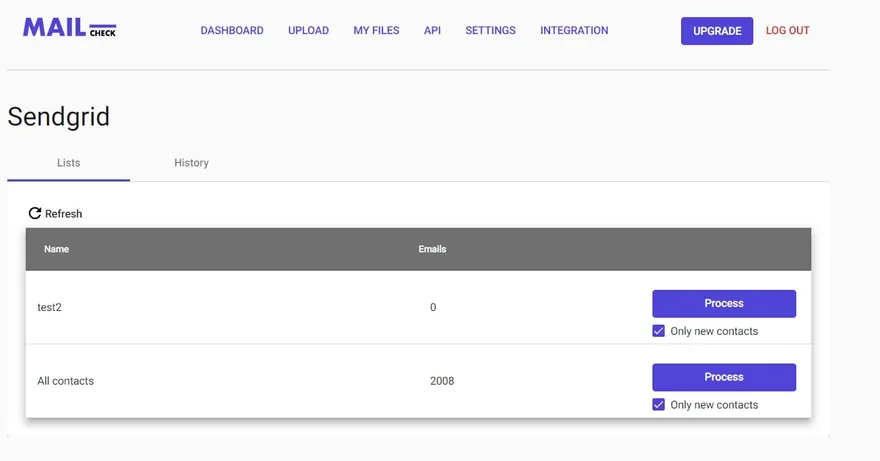
Step 11
Hit “Process” to get it rolling
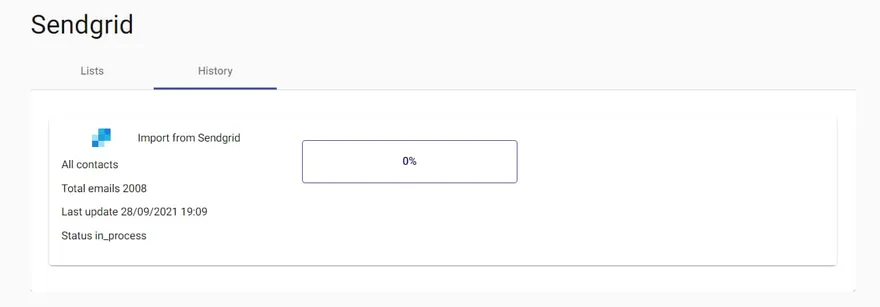
Step 12
As soon as you reach 100% your data will be sent to your SendGrid account
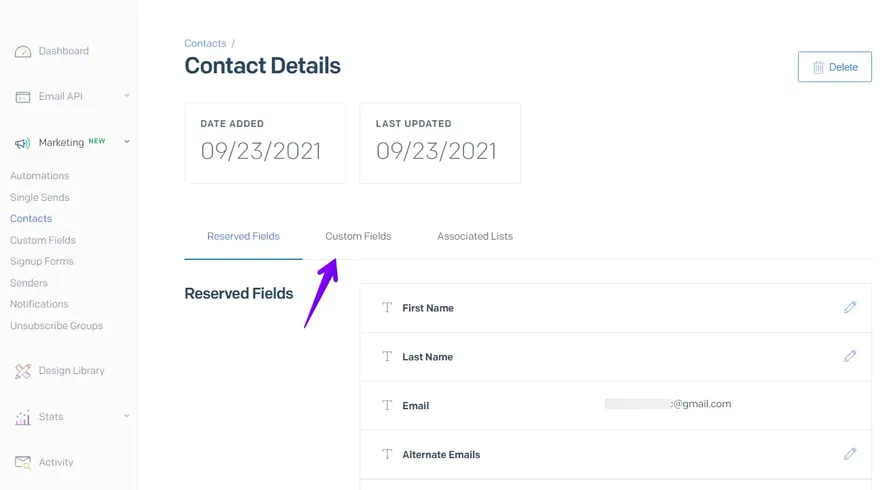
Step 13
To view the results per user please go to your SendGrid account and click “Marketing” choose “Contacts” in the dropdown and select the list that was validated by Mailcheck, click an email to open a detailed info
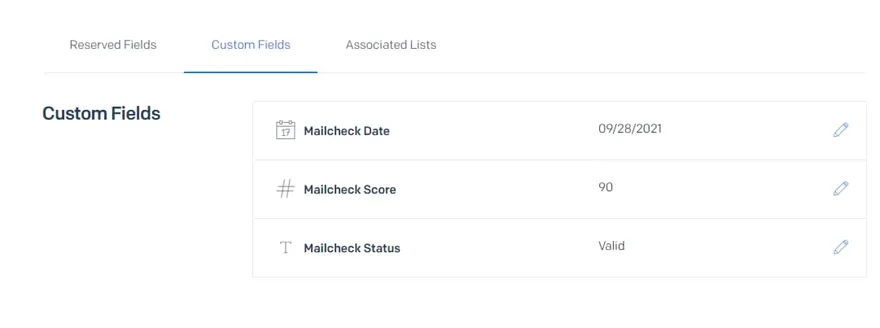
Step 14
To filter data within the Sendgrid and then use it for emailing, it’s necessary to create a new list with a custom segment where the emails with “Mailcheck status” (Valid, Risky, Invalid) can be selected.
OR
Create a segment within the existing list
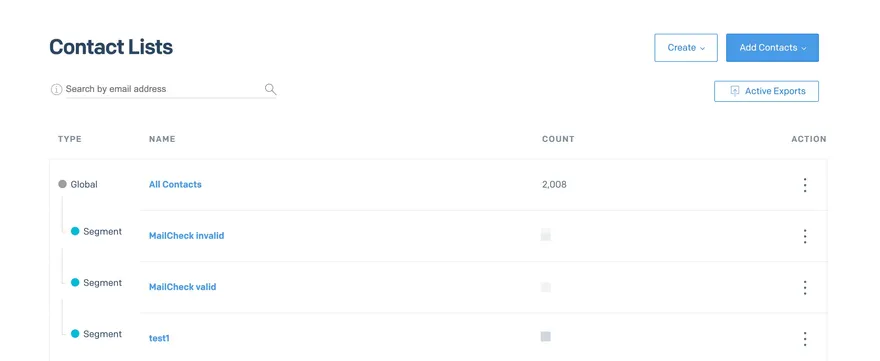
The above screenshot shows the existing list with segments to trigger it, you have to click on “Kebab menu icon” (Vertical three dots) AND hit “Create a segment”

Step 15
Name your segment
Step 16
Select which contact you would like to segment
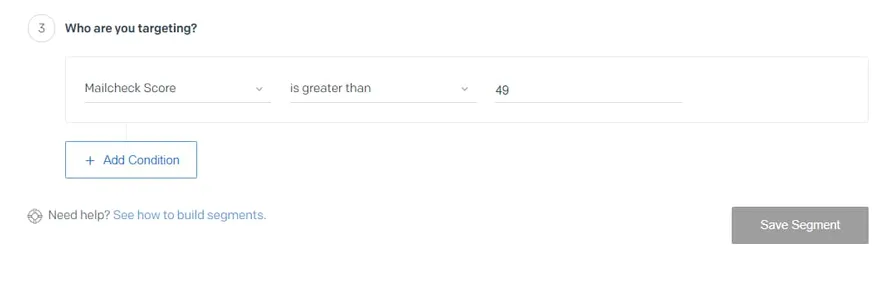
Step 17
Here you must choose “Mailcheck status” OR “Mailcheck Score” I usually use both “Valid” AND “Risky” emails so I’ll add *Mailcheck Score
Step 18
Save segment and use the list for emailing/automation
Thank you!
Other popular integrations guides: Mailchimp, Woodpecker, MailerLite, Make.com, Zapier, Integromat.